I had expected all to be well with my master cylinder- it had always been full of fluid and the pedal was always firm... even if the brakes didn't work. However now I have freed up and renovated all the calipers I got some very strange results whilst bleeding. I got a one man vacuum bleeding kit from XXR- not expensive and pretty much ideal for me working on my own. However, one wheel (front passenger) simply wouldn't work- I don't think its pulling a vacuum into the system and there looks to be a blockage very close to the nipple... maybe this is grease remaining from pumping the piston out (although I had checked)? The other wheels do bleed fluid from the MC, but never in a continuous stream- its always intermittent and bubbly. Further pressing the brake isn't really pumping anything and so clearly something is amiss. Of course there are explanations for this- the car is raised and this means the fluid doesn't flow inside the MC properly- maybe its always running too low to bleed? In any event it looked like a good idea to at least check the MC... but I didn't expect a problem...
 |
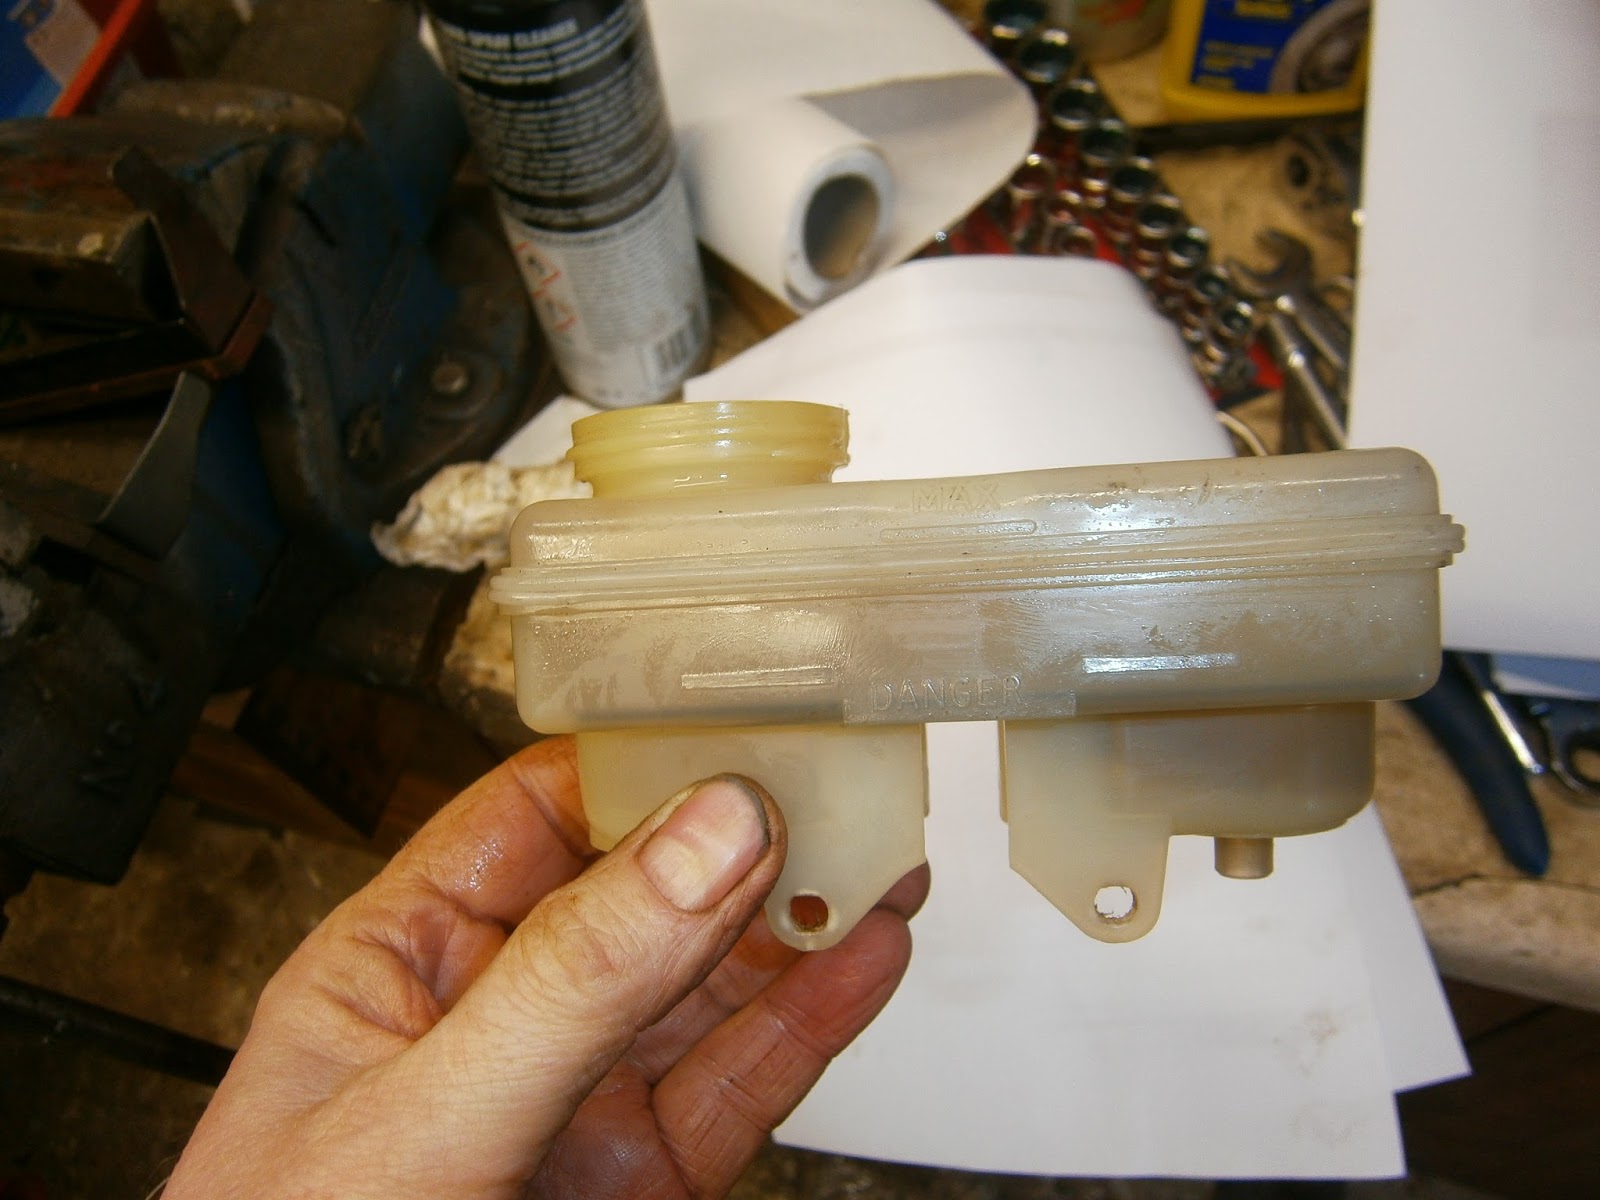
| Master cylinder- servo- signs of some muck in reservoir |
 |
| Pipe entries a bit rusty |
 |
| ID tag |
The MC was a bit rusty externally- I didn't want to get any muck in it as I took it off so I carefully wire brushed the loose rust off by hand... now that turned out to be one of the most pointless tasks you can imagine- but hey at this stage I was being careful!
 |
| De-rusted prior top opening |
I detached both brake pipes catching the fluid and then unscrewed the two 19 mm nuts that hold the MC to the servo. There is no sealing between these units- I had expected a gasket or an O ring but in fact the Excel uses neither. That's when I got my first look- and yes you've guessed it- disgusting rusty crud everywhere. The rear of the MC (and the front of the servo for that matter) look terrible- possibly due to the lack of a gasket. I suspect I will end up needing new ones for both- but hey press on! At least this vindicated my decision to strip it. It was so mucky I had to clean it before I could even see how to strip the thing! Some of this at least was grease so I guess that shows steps were taken to protect the metal here- but if so then the attempt is well-past its sell-by date and its no longer protecting anything.
 |
| Removing MC nuts |
 |
| Pretty nasty inside servo, rust around the seal doesn't bode well. no gasket here |
 |
| Muck in the end of the master cylinder! |
The reservoir had some very fine silty dirt settled at the bottom- always a good idea not to pump this round as well. Best to clean that out.
 |
| Silty stuff inside reservoir. |
 |
| MC held in soft-jawed vice |
I held the MC in the vice (soft jaws) so that the reservoir retaining pins were accessible. These could then be knocked out with a punch, I used one slightly larger than the pins to start with and changed to one the same size or slightly smaller as the pin entered the body.
 |
| Punching out roll-pins |
 |
| ... and roll pins removed. |
Both were punched out and the reservoir could then be removed (tight) for cleaning.
 |
| Wiggling the reservoir to remove it- its was tight but pulled free. |
 |
| Port entries are different sizes, the smaller one is the front port. Some muck around each. |
The two compartments of the reservoir communicate via side channels that open in the rear chamber nearest the servo. I was able to spray carb cleaner through these openings and shake to remove most of the silty sediment. I then left the reservoir to drain fully via these openings.
 |
| View of openings to second compartment- spraying cleaner in here allowed it to enter and rinse the second (forward) compartment. |
 |
| Rinsing forward compartment |
 |
| Ports in the top of the MC, larger rubber grommet in the forward port (left), recessed ring seat in the bottom of the rearward port (right). Much dirt, rust and muck in here also |
 |
| The forward seal has a short groove in it, I don't know what this is for and must check to see if it has to be positioned anywhere in particular.- Later note- its not mentioned in the Girling service notes so I ignored it. |
Both ports have rubber seals, that in the forward port is obvious, the rear one is a ring seal, recessed at the base of the port and a bit tricky to remove without scratching the port. Eventually I speared it with a sharp scriber (not all the way through) and then fished it out.
NOTE- you may not be able to get another one of these so take better care of it in case it can be reused!
The forward slot was relatively clean and the stop-pin was visible inside, the rear slot was rusty and corroded- must have been water here at some time. I removed the rubber bung and cleaned both ports.
 |
| Removing the forward port seal. Note "stop pin" inside |
 |
| Better view of stop-pin |
At the rear of the cylinder the primary piston is usually retained by a circlip- this was true in this case although it was an unusual thick nylon circlip with a castellated inner profile, but this was removed in the same way with circlip pliers.
 |
| cleaned up mc end to show circlip |
 |
| circlip removed... |
 |
| ... it has a castellated lower (ie forward facing) section. |
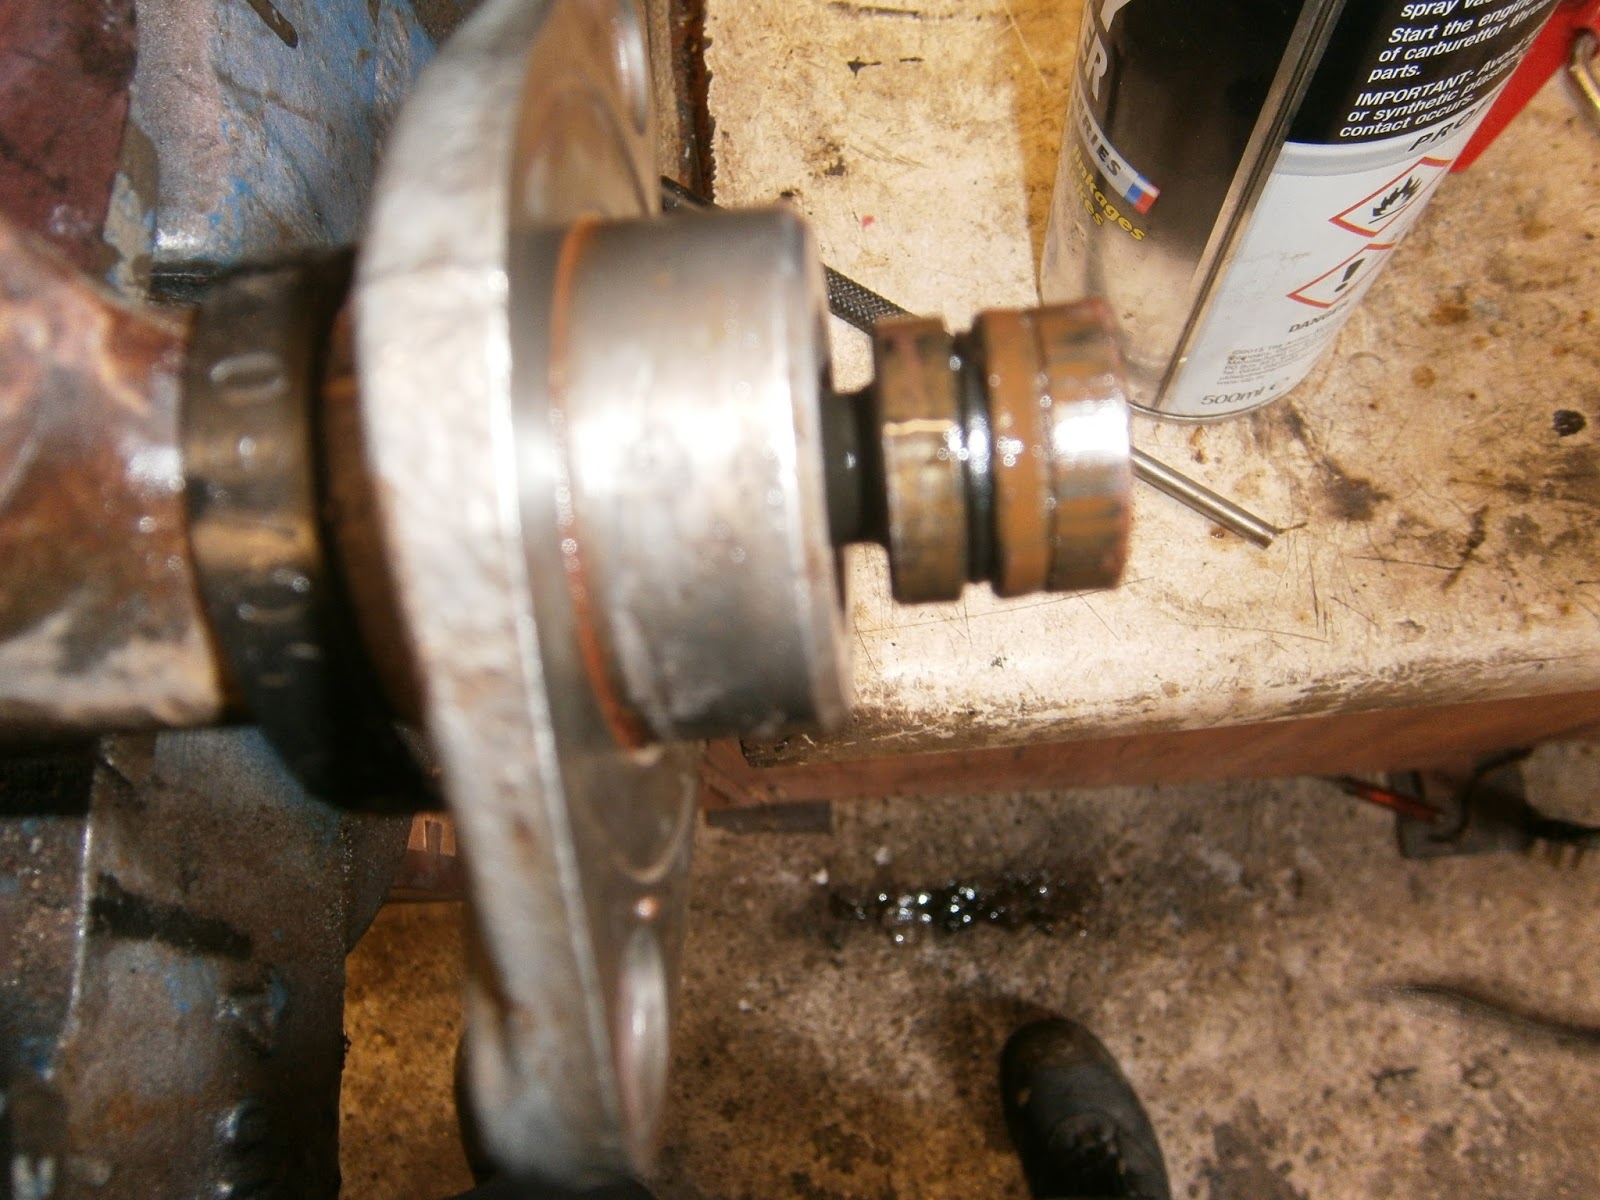
The primary piston plunger was beneath, ringed by a build up of corrosion which I cleaned off as it will damage the piston as its withdrawn. At this stage the primary piston is still locked in the MC by the stop pin in the front port. To remove this press the piston in as far as it will go using a wooden rod to relieve the spring tension, then using snipe-nose pliers grip the stop pin and pull it up.
 |
| PRESS IN the piston and remove the stop pin- don't release pressure suddenly, relax it slowly |
 |
| the primary piston will be sprung out past the end of the MC... violently if you release pressure all at once! |
 |
| ... it can then be removed easily. |
 |
| Primary piston assembly as released. Note seal orientation- front seal- nearest spring is flared towards the spring- ie towards the front of the piston. The hollow side is exposed to the spring and the tab washer slips into this groove. The rear seal was fitted the same way round with its flare also facing the front of the piston, but its worn here and not at all clear. |
This releases the piston but its still under spring tension so hold it in and release it slowly or it will shower all the contents all round the garage. The piston will now be protruding from the end of the MC and can be pulled out- this will bring some fluid with it. The primary piston spring is fixed in position as it is sandwiched between the piston at one end and a spring cup at the other. Place the whole assembly somewhere clean. In my case the front seal didn't look too bad but the rear seal was flattened. This could be the source of my problem.
The secondary piston is now free but it wont spring out on its own, so just tap the MC on the bench to shock it down far enough so that you can grab it and pull it out- again it will come with its spring and some fluid.
 |
| Tap MC on the bench until... |
 |
| ... the secondary piston jars far enough forward to be grabbed and withdrawn from the cylinder. |
 |
| Secondary piston assembly as withdrawn. Note seal orientation- seal nearest spring is flared forwards, tab washer enters exposed groove; and that on the plunger flared backwards- both seals look in better condition on this piston, but there is a lot of muck on the piston itself which shows a lot of something other than brake fluid has passed through here! |
In order to change the seals you have to detach both springs. The secondary piston is easier, it has a tapered spring (narrow end towards the piston) and this is just retained as a tight fit in a groove in the piston. You can just lever that carefully out and then the spring can be pulled off the piston. There is a strange tabbed washer between the spring and the seal (Girling call it a "recuperating washer" so I think it must help the seal recover or maintain its shape), but both just slip off once the spring is removed. Note that there is a small metal shim immediately beneath the seal.
 |
| Tapered spring sits in a groove in the piston. Levering this out releases the spring... |
 |
| ... and the tab washer beneath can be slipped off. . The seal just slips off too... |
 |
| ... revealing the thin metal washer beneath |
The primary piston spring is held on by a 3/32 Allen screw recessed into the base of the end cup. Using an Allen key unscrew this and remove the spring and cup. Once again there is a tab washer above the seal and a shim washer below it. I don't know if these washers are the same (I think so) but I kept them separate anyway.- I have since found that they are the same and new ones come in the kit anyway!
 |
| Primary piston- spring cup to left |
 |
| Allen screw inside spring cup |
 |
| 3/32 Allen key required to ... |
 |
| ... remove the screw which detaches the spring from the primary piston. |
 |
| This piston comes apart much as the secondary piston did, tab washer above the seal and shim below. |
Seals and Orientation
Both pistons have a second seal on the "plunger" part and this is easily removed if you pinch it to distort it and cause it to bulge, you can then grab the distorted section and slide it out of the groove, up and over the plunger. Note the way that they are fitted, and as usual this seems to cause some confusion. The front seal in each case (i.e. the one nearest to the spring) has its flare facing the front of the piston. In other words the tab washer slips down into the groove so exposed. This is so that as the piston is pushed forwards the hollow of the seal catches fluid and is pressed hard against the sides of the cylinder. The rear seal on the forward (secondary) piston faces backwards (away from the spring) so that as the piston moves back this seal will also be expanded. Now comes the confusion; The Excel forum is clear- both pistons should have their seals facing in opposite directions, the front seal flare faces forward and the rear seal flares backwards, and there are several diagrams showing this on the web. However the seals as fitted in my M/C were different: the secondary piston did indeed have its seals fitted in opposite ways around; but the primary piston had
both seals with flares facing forwards (towards the spring). This is also how they are shown in the instructions that came with the Girling kit- and that's how I'm going to refit.
 |
| Pistons as removed- forward seals already removed. Secondary piston (top) rear seal flare faces to right (away from spring site) ; primary piston (bottom) rear seal flare faces left (towards spring position). |
Cleaning and Honing
The MC is now fully stripped, I cleaned it up with carb cleaner and then put it in the sonicator for a blast at 65 degrees. I will try to remove all the the rings of corrosion around the back and the fluid ports using Deox-C as I did for the calipers. I don't want to scratch anything and at least this is a gentle method.
Master cylinder was greatly improved by DeoxC treatment. I rinsed it in water then briefly in Jenolite to prevent flash rust formation. The inside was sprayed with WD40 to remove the water and protect the surface.
I used a brake hone with plenty of oil to gently hone the inside surface. A Flexi hone would be better but these seem tricky to find in the UK and postage from the US is a killer!
 |
| Honing the bore |
 |
| Honed interior of MC |
To be frank I may have overdone this or used too little oil... but the bore did end up with a cross-hatched surface but less smooth than I had hoped. I may re-hone to try and smooth this out a bit more.
Rebuilding
Parts are the problem here! The MC on this car is a Girling, it carries a black plastic tag identifying it as 66163 corresponding to Girling no 74660374, it has a
7/8" (22.2 mm) bore. However there seem to be two types of Girling cylinder used on the Excel (in addition to the Bendix). These are Girling numbers 74660374 and the 74966000 (I don't know the tag number for the latter). The rebuild kits for these are Girling SP2769 and SP7684 respectively- although I cant find either one anywhere! Of the two, the 7684 does appear to be the right one from the pics I have seen online. In the absence of the correct service part others have used close matches... The Saab 99 MC was I think identical but now replaced by the Saab 900 version. This is still very similar and has been used by some owners as a cylinder replacement- although there is I think an extra port that may need to be blocked off. The repair kit for the Saab cylinder is Girling SP8277 and looks to contain all the items needed except the seal for the rear reservoir port. I have ordered one of these kits and will see if it fits- and if so where I can get a suitable seal for the rear port.
The second close match is the Landrover 88/109 although this model has had many different MCs fitted in its long life- some of which were certainly 22.2 mm ... but not all. I don't know which kits would fit... but to surprise its not Kit number SP7683. This might be only "1" catalogue number away from the kit I need but its the wrong size!
If all else fails I can look to fit a complete Saab (or more likely a Landrover) MC. I am told NRC8960 will do the job but I may need to adjust the brake pipe unions because the front one has a different thread. I believe the existing servo can be used but I'm not sure that the fluid level warning light will work. It is only a little over £30 so its much cheaper than a Lotus reconditioned part and only about twice the cost of a repair kit as these have gone up due to increasing rarity value! Anyway my plan is always to preserve the original if I can so I will try to sort out a suitable repair kit first, and replace the MC only if that fails...
The Girling kit duly arrived. The contents of this kit are shown below. It contains Top row left to right: Circlip, 2 shim washers, 2 tab washers. Lower row; 2 reservoir seals (only 1 suitable for my cylinder), two piston front seals and two piston rear seals. It also came with some instructions and the infamous diagram that puts the cat amongst the pigeons as regards the rear seal on the primary piston.
 |
| Girling service leaflet- instructions for secondary piston seals |
 |
| Girling service leaflet- instructions for primary piston seals. |
The seals at front and rear of the pistons are different, those fitted to the rear of the piston are a little higher and have a longer centre section.
 |
| Extra centre section on rear (plunger) seal between finger and thumb, forward seal in hand |
 |
Rear seals (right) stand a little higher than front seals (left).
|
There's not a lot to say about the reassembly- it is pretty much the revers of the dismantling. Its really important to lube everything well with brake fluid though.
 |
| I soaked the seals in brake fluid, dip the pistons in immediately before fitting and flood the MC with fluid before trying to insert a piston. |
 |
| Shim washer first |
 |
| Then seal and tab washer ... or recuperating washer as Girling call it! |
 |
| Finally the spring |
The primary piston was assembled in the same way, compressing the spring in order to screw in the Allen screw to retain the spring cup.
I inserted both pistons and compresses the primary so that the locking pin could be inserted- I had to use the old one as by now I had lost the new one! I also reused the reservoir seal for the rear chamber- so I would advise taking more care of this one during the disassembly!
 |
| As it would be a while before the servo was ready I thought I should store the MC with some fluid in it for safety. I blocked off the outlet holes using a spare brake union and some film. |
 |
| Refilled with fluid to store for reassembly. |
Finally in position!
I did have a bit of trouble bleeding the brakes as the calipers had a sort of mastitis... blocked nipples! However cleaning these meant that function returned. I will also add that bleeding is greatly impeded if the car isn't reasonably level because of the angle of the MC.


Very informative. Thanks
ReplyDeleteReally really helpful, thanks!
ReplyDelete